 ≡
≡
Automatic Deployment of Custom Settings Deploying Softros LAN Messenger’s settings in a Windows Server 2019 domain
A Windows Active Directory (AD) domain allows you to automatically deploy custom settings of Softros LAN Messenger across the network. With the help of this manual, you can distribute the following files:
- General.ini – most of the application’s settings (see below)
- Network.cfg – network settings (exported from the Network tab)
- Settings.data – groups settings (exported from the General tab)
- Admin.ini – administrative restrictions (found in the application’s installation folder)
- SoftrosLANMessengerKey.slic – license file (received after the purchase)
Make sure the files have the same names as in the following instructions, or they will not be distributed.
About the General.ini file
Most of Softros LAN Messenger’s settings are stored in the General.ini file found in the %appdata%\Softros LAN Messenger folder. %appdata% is unique for each user and usually stands for: C:\Users\USERNAME\AppData\Roaming\ Note that AppData is a hidden folder.
To centrally modify the settings, configure Softros LAN Messenger on one of your computers, and then locate and copy the General.ini file from it. You will need this file later as the source of your custom settings.
Configuring a deployment script in AD
The idea of distributing the settings involves editing the end users’ configuration files with a logon script. For this purpose, a Group Policy Object (GPO) will be created and edited in the following example.
If Softros LAN Messenger itself has been previously deployed in your AD domain, then instead of following steps 2–5, you can open for editing the GPO created for that deployment.
-
Click the Start button, and then navigate to Windows Administrative Tools ➜
Group Policy Management.
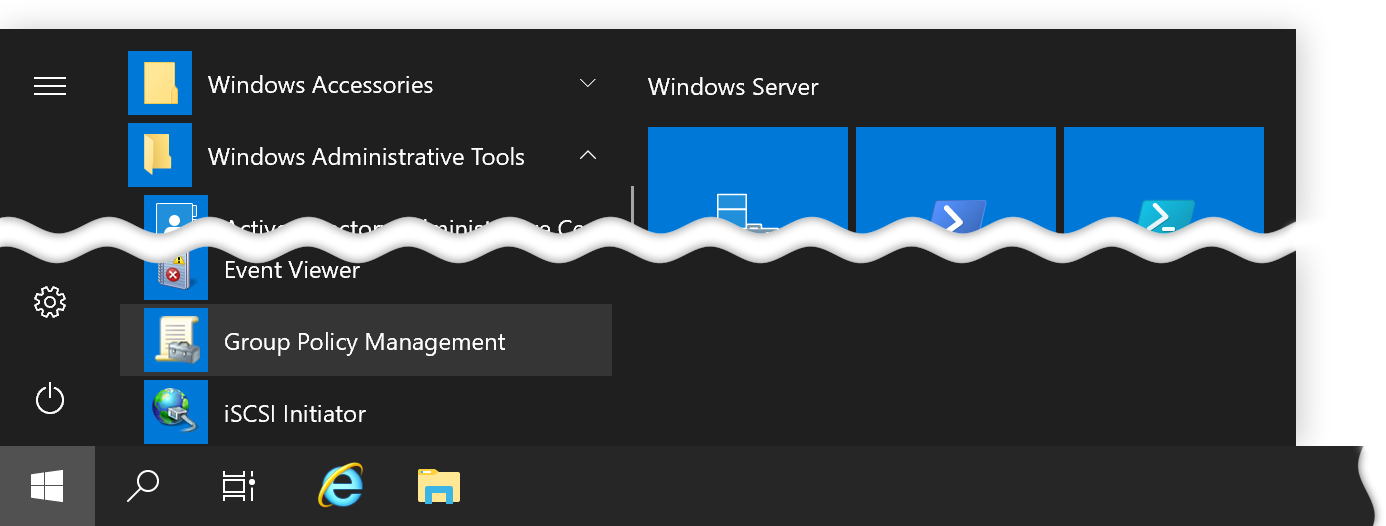
Opening Group Policy Management -
In the left-hand pane of the Group Policy Management window, navigate to your domain, right-click it,
and then click Create a GPO in this domain, and Link it here.
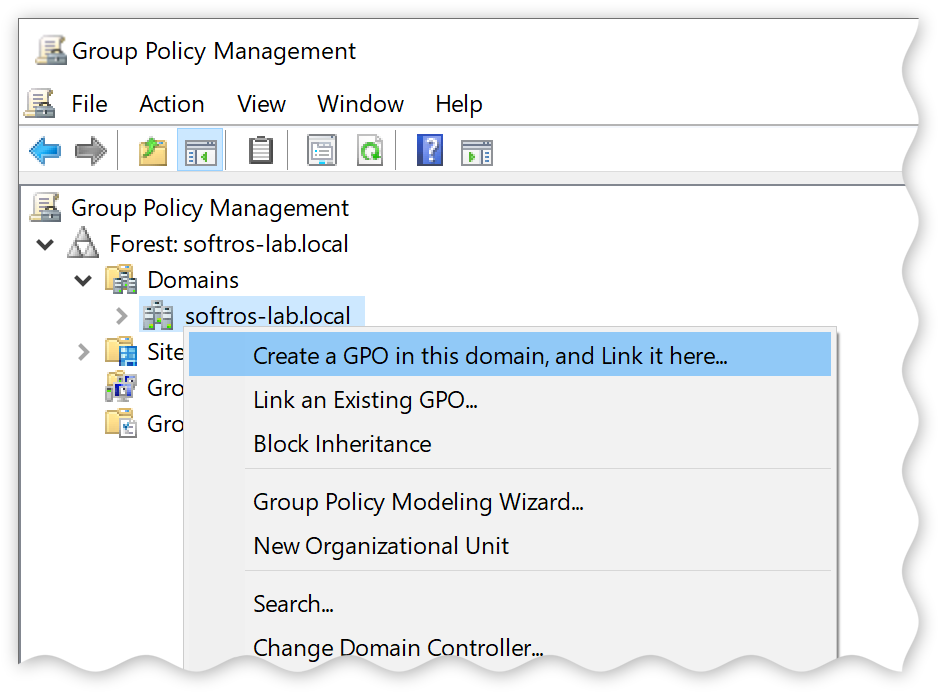
Context menu of a domain -
In the New GPO dialog box, enter a name for the new Group Policy Object (GPO), and then click OK.
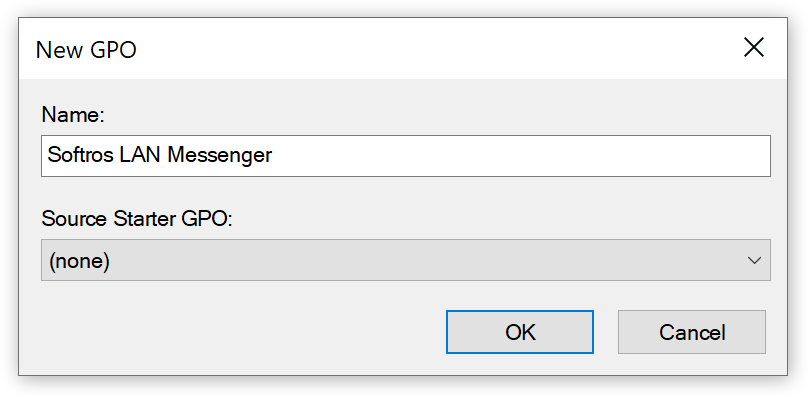
Adding a new GPO - By default, the new GPO will be applied to all computers authenticated in the domain (group Authenticated Users). If necessary, you can edit the computer list using Security Filtering in the right-hand pane of the Group Policy Management window.
-
In the left-hand pane of the Group Policy Management window, right-click the new GPO,
and then click Edit.
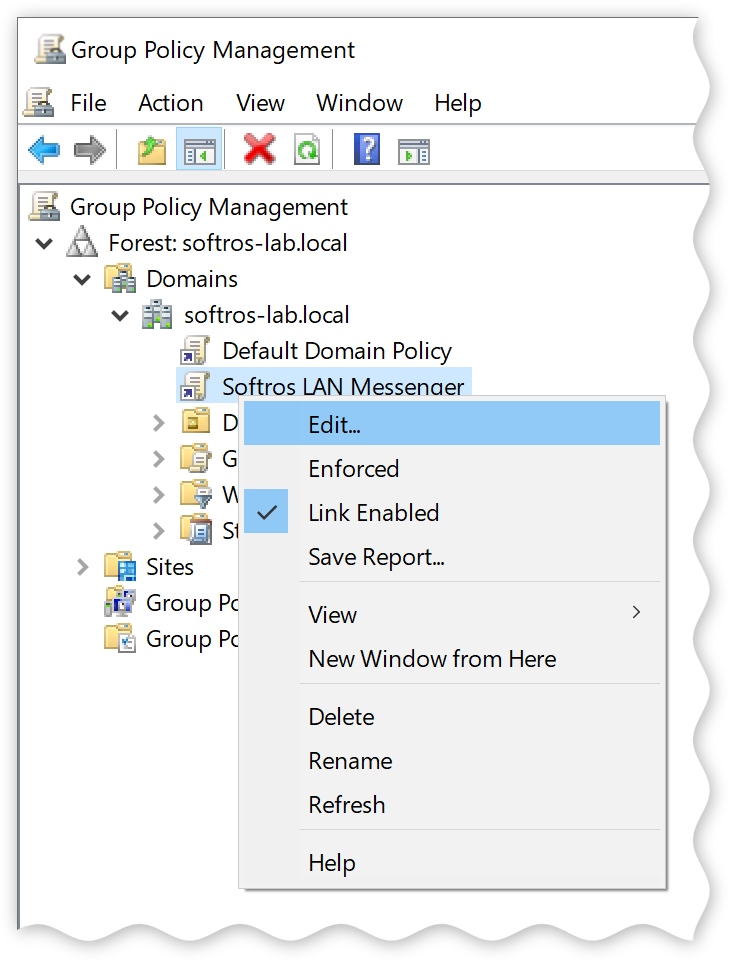
Context menu of a GPO -
If you are distributing the Admin.ini and/or Custom.ini files, check
the Notes section below. If you are distributing any combination of the other files,
in the left-hand pane of the Group Policy Management Editor window, navigate to
Scripts (Logon/Logoff), and then click it. In the right-hand pane, double-click
Logon.
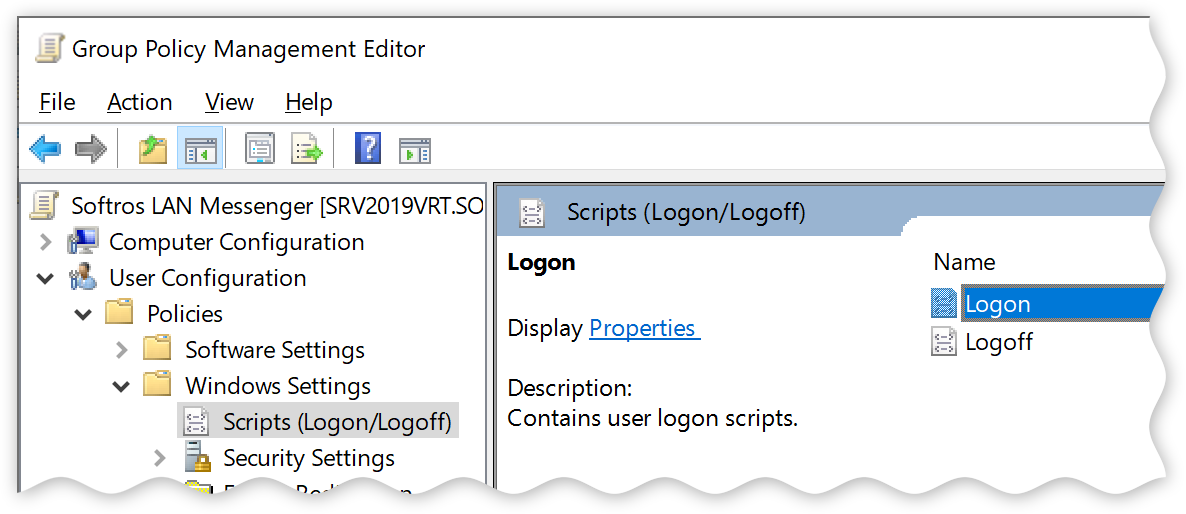
Scripts (Logon/Logoff) component -
In the Logon Properties dialog box, click Show Files.
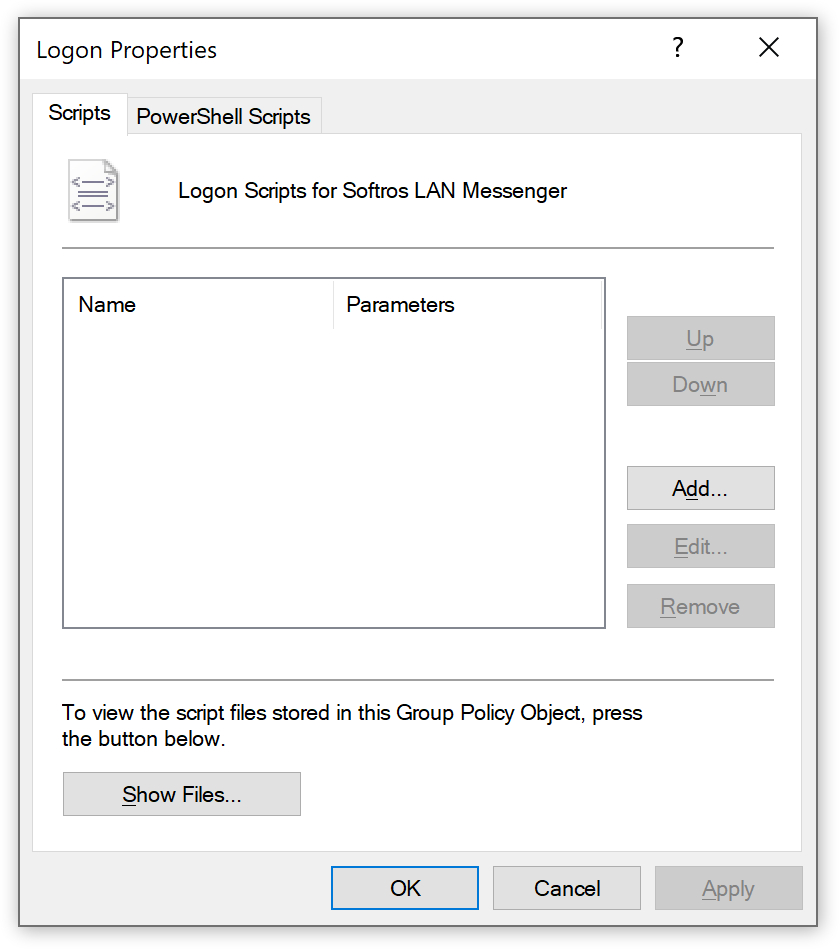
Logon Properties dialog box -
Download this VBS script
developed by our engineers, and then put it into the folder opened in step 7. Additionally, put all the
files you are deploying into the same folder.
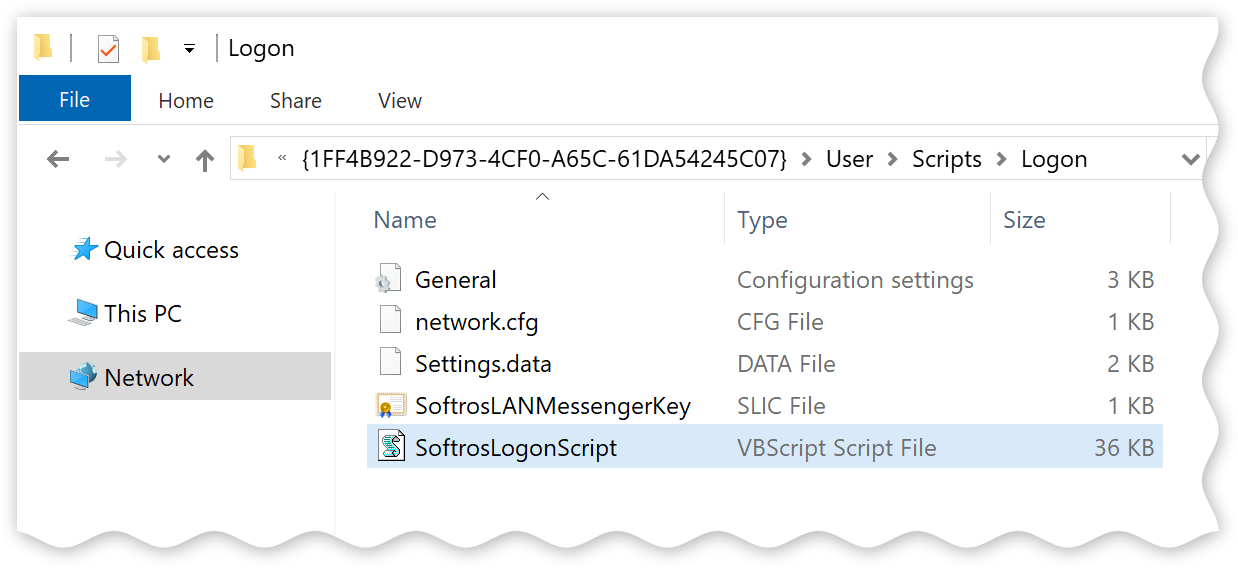
Script and configuration file in the Logon folder - In the Logon Properties dialog box, click Add.
-
In the Add a Script dialog box, click Browse, navigate to the folder
from step 8, click the script file, click Open, and then click OK.
Do NOT add any other files to the list in the Logon Properties dialog box.
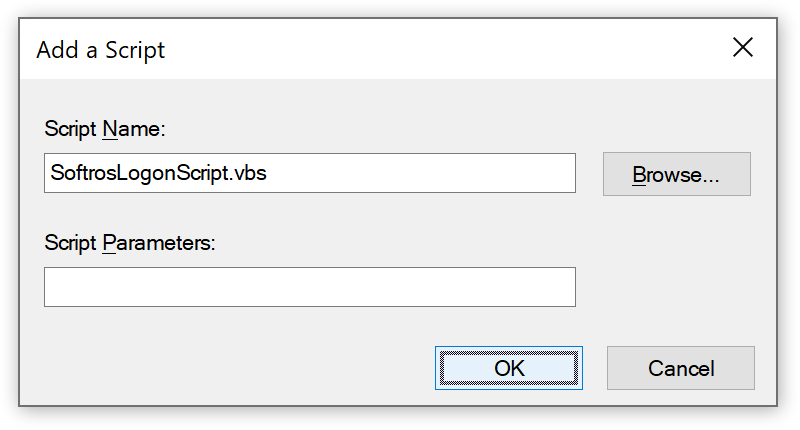
Adding a logon script - In the Logon Properties dialog box, click OK, and then close all the other dialog boxes.
Notes
The logon script only transfers certain settings from the General.ini file as opposed to copying its entire contents. This means that any personal information or information missing from the source file is controlled by the end user.
If you are deploying the Admin.ini and/or Custom.ini files, then in step 6, in the left-hand pane of the Group Policy Management Editor window, you need navigate to Scripts (Startup/Shutdown), and then use the Startup option in the right-hand pane.