 ≡
≡
Desktop Sharing
Softros LAN Messenger comes with simple and secure desktop sharing functionality. It is based on Microsoft's Remote Assistance technology and thus available on machines running Windows only.
To access the desktop sharing features, follow these steps.
- Download and install Softros LAN messenger
- Restore Softros LAN Messenger from the taskbar notification area.
- Start a conversation with the user you would like to request assistance from or whose desktop you would like to connect to.
- On the toolbar of the Conversation window, click the
 Desktop Sharing button.

Desktop Sharing button in the Conversation window - Depending on what you need to do, click either of the two available options.
- Request Assistance from – allows you to ask the remote user to connect to your desktop.
- Remote into Computer – allows you to connect to the remote user's desktop.
Requesting Remote Assistance
- Click Request Assistance from. The following message will appear in the Conversation text box.
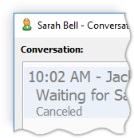
If you need to revoke your request, click Cancel. The button will then turn into the status Canceled.

Remote assistance request is sent
Remote assistance request is canceled -
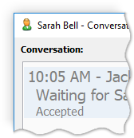
Once the remote user has accepted your request, the button Cancel will turn into the status
Accepted meaning the session has started.
Additionally, a semitransparent dialog box notifying you about the session's status will be displayed on your desktop as long as the session is active. The box cannot be hidden, covered or closed without the session being interrupted. You can, however, move it across the screen.

Remote assistance request is accepted
Remote Assistance status dialog box -
To finish the remote session at any time, click End Session in the status dialog box.
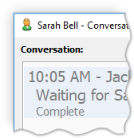
Once you have ended the session, the status Accepted in the Conversation text box will change to Complete.

Remote assistance session is complete
Providing Remote Assistance
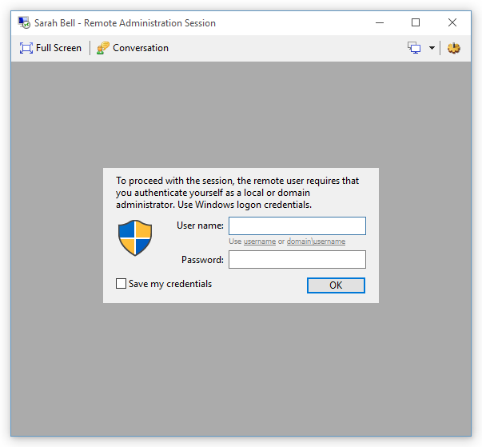
- Click Remote into Computer. A remote session window will open on your desktop.
If you need to cancel the session, click the Close

Remoting into another user's computer button found in the top right-hand corner of the window.
- Enter the user name and password of an account that has administrative rights on the remote computer. This can be a local or domain administrator account and may not necessarily be the user account you are connecting to. Optionally, you can check the Save my credentials check box for faster logon later on. Finally, click OK.
-
After you have successfully logged on, a semitransparent dialog box notifying you about the session's status will be
displayed on the remote user's desktop as long as the session is active. The box cannot be hidden,
covered or closed without the session being interrupted. You can, however, move it across the remote user's screen.

Remote Control status dialog box -
When you are finished with the session, click the
Close
 button in the remote session window to end it.
If the remote user ends the session on their side first, you will be notified with the following message:

Remote session is ended
Toolbar
The following buttons are found on the toolbar of the remote session window.
-
 Full Screen –
makes the window fill the whole screen.
-
 Conversation –
brings the conversation you are having with the remote user to the foreground.
-
 View Settings –
gives you access to several viewing options.
Auto Scale – makes the remote user's entire desktop fit into the remote session window. If this option is unchecked, the remote desktop will be displayed in its original resolution.
Auto Scroll – allows you to scroll the remote desktop by simply moving your mouse to its sides. This option is enabled only if the Auto Scale option is unchecked.
Keep Aspect Ratio – keeps the remote desktop's original aspect ratio within the remote session window. This option is enabled only if the Auto Scale option is checked. -
 Switch Monitors or Select Viewing Option –
gives you control of how the remote user’s displays are shown in the remote session window. This button
is enabled only if the remote computer has two or more monitors. Clicking the left part of the button
switches the view to the next available display.
Clicking the arrow ( ) shows you a detailed list of the remote user’s
monitors. It contains each monitor’s name, connection type, and resolution. The remote system’s primary display is highlighted in bold.
The display that is currently being viewed is marked with a dot. There are also additional options available here:
Switch to All-in-One View – combines all of the remote user’s displays in one view.
Switch to Multi-Monitor View – switches the view back to just one display at a time.
Hide Multi-Monitor Preview/Show Multi-Monitor Preview – hides/shows a small floating window with a preview of all of the remote user’s displays. This window can be used to switch between displays and by default is shown at the top of the remote session window.
Selecting a remote display
Notes
- The desktop sharing features are disabled if:
- you are having a group conversation;
- the remote user has an incompatible version of Softros LAN Messenger installed on their computer;
- the remote user is offline.
- Use of the desktop sharing features can be restricted with the Admin.ini file.
- Microsoft's Remote Assistance technology requires access to dynamic ports allocated by the system in the range TCP/UDP 49152-65535. If those ports are not open on your personal firewall, router or VPN tunnel, the desktop sharing features may not work correctly.